www.DaystarWeb.com
Tech Support Contact Info
Tech@DaystarWeb.com
Phone: 623.907.0081
Fax: 623.907.0088
841 South 71
st
Avenue
Phoenix, AZ 85043
Instruction Sheet # P11203-01
2007 Daystar Products International Inc.
Bill of Materials
WARNING
This vehicle has been modified to enhance its performance. The steering, braking and handling
of this vehicle will differ from standard passenger cars and trucks, This vehicle handles differently
from an ordinary vehicle in driving conditions which may occur on streets, highways and off road.
Avoid unnecessary abrupt maneuvers, sudden stops, sharp turns and other driving conditions
that could cause loss of control, possibly leading to a roll over or other accident that could result in
serious injury or death to driver and passengers. If larger tires are installed the speedometer will
read lower than the vehicles actual speed.
DRIVE WITH CARE, REDUCE SPEED AND WEAR SEAT BELTS AT ALL TIMES.
Do not combine with any other suspension kits.
This kit should be installed by a professional mechanic.
CAUTION: BEFORE BEGINNING INSTALLATION, READ
ALL INSTRUCTIONS CAREFULLY AND COMPLETELY.
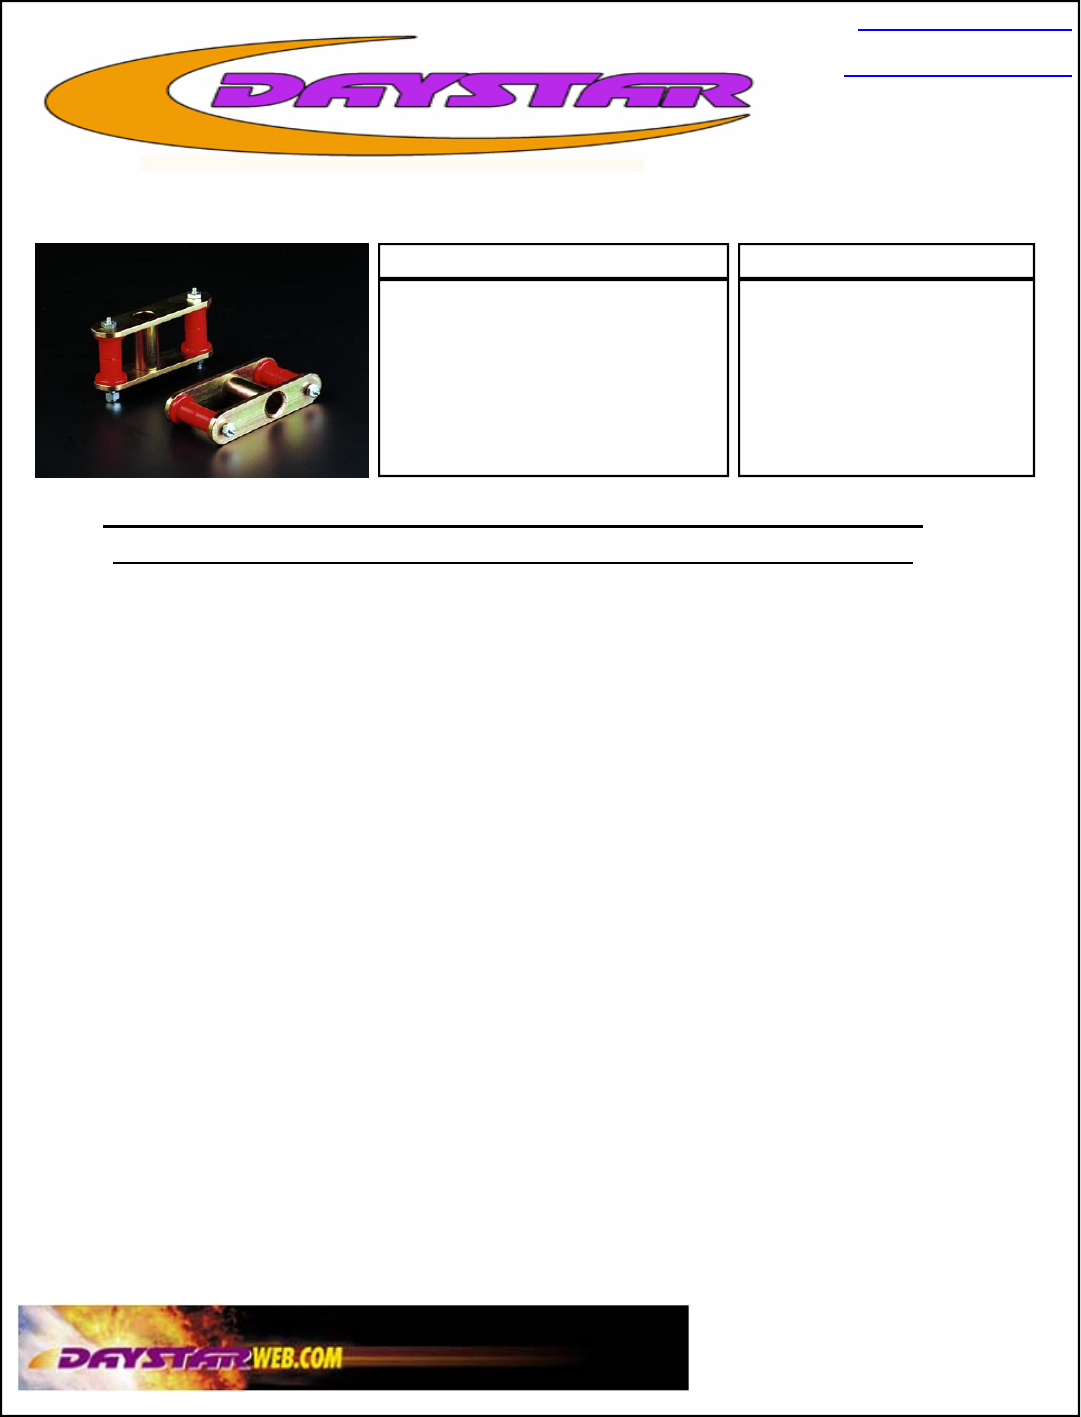
Greaseable Super Shackle kit. Part # KJ61015
1. Park vehicle on a level area and set the emergency brake. Block the tires opposite of the side you are working on. Lift
one end of the vehicle using a floor jack until the wheel clears the ground approx 3”. Place jack stands under the
frame rail behind the spring perch. Lower vehicle onto the jack stands with the axle supported by the floor jack.
2. Carefully remove upper and lower spring mounting hardware, left and right shackles. Lower the axel carefully until
the wheels touch the ground. Make sure that brake lines and the axel vent line is not over stretched.
3. Remove the spring eye bushings and steel sleeves assembly from spring eyes. Some frame shackle bushings need to
reuse the outer spring shell. Take care not to damage the steel shell.
4. Lubricate the bushings before installing them.
5. Install the spring and frame shackle bushings and sleeves.
6. Install the shackle onto the frame side first. Shackles with off-centered tube, install the long end up toward the frame
and short end down towards the spring.
7. Install the upper bolts and nuts. Tighten the nuts so the shackles swing freely. DO NOT OVER-TIGHTEN THE
NUTS OR SHACKLE.
8. Using the floor jack raise the rear axle until the spring eye aligns with the shackle. Insert the bolts and tighten the nut.
DO NOT OVER-TIGHTEN THE NUTS.
9. Grease the shackles bolts with DAYSTAR LUBRETHANE POLY LUBE ( KU11004 ) or silicon and or Teflon lu-
bricant.
Jack stands
Floor jack
Wheel blocks
Hand tools
Hammer
Tools Needed
S10445 X 2 SHACKLE
BJ02020 X 1 BAG KIT
S10222 X 4 TUBING
S10193 X 4 BOLT
S10202 X 4 NUT
M02221 X 8 BUSHING
 (4 pages)
 Manymanuals.com
 Manymanuals.de
 Manymanuals.fr
 Manymanuals.it
 Manymanuals.pl
 Manymanuals.cz
 Manymanuals.es
 Manymanuals-pt.com
Comments to this Manuals